Homemade Chocolate Frosting

One day I was baking a cake when I realized that I had no store bought frosting on hand! So after a quick scan in my cupboards I found powdered sugar and cocoa powder that I had bought for holiday baking. So  a quick search and I found a simple recipe for chocolate frosting!

Ingredients:

3 cups powdered sugar

3/4 cup unsweetened cocoa powder

1 stick unsalted butter

1/4 cup milk

1/4 teaspoon vanilla

The inspiration: http://www.simplyscratch.com/2010/07/homemade-chocolate-frosting.html

Cocoa powder and powdered sugar blended together.

Cocoa powder and powdered sugar blended together.

Sift sugar and cocoa powder together in a bowl then in another bowl cream together the butter and vanilla. Add a cup of the cocoa sugar mix to the butter then add a bit of milk then more of the sugar coca mix. Keep mixing the sugar cocoa and milk until you get the desired consistency.

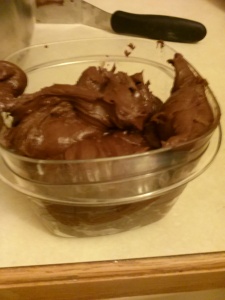
Finished frosting!

Finished frosting!

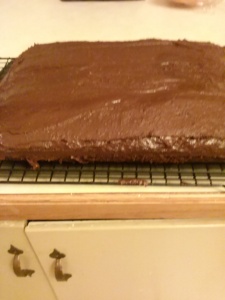
Then you use the frosting!! I spread mine over a sheet cake and it was delicious!!

cake ready to eat!

cake ready to eat!

Tips from me:

#1 I didn’t have a sifter to mix the sugar and cocoa powder so I added each to my food processor and pulsed it for a bit until it was blended!

#2 For thicker frosting use less milk and for thinner frosting, like a glaze, use more milk.

#3 Before you go and buy anything at the store look in your pantry! I am big on reusing items and I used up the rest of the cocoa powder and powdered sugar that I had purchased for Christmas cookies!

I liked how easy and delicious this frosting is! I have been using it ever since for all my cakes, brownies, and cupcakes! At first my daughter wasn’t sure if she wanted to try it. I realized then just how little I made basic items like frosting if her only exposure in 13 years is store bought! I informed her that before once upon a time people had to make their own cakes and frosting at home before mixes and store bought frosting was available. She then tried a slice of cake and declared it was the best frosting she’d ever had! Now I make it a point to make a lot of stuff without mixes so she can taste real home cooking!


Happy Pinning!!
Smothered Chicken Breasts

I wrote a post for a crock pot recipe for round steak and gravy, which I thought was amazingly delicious, and one day I wanted some but didn’t have any steak. So I decided to try chicken breasts in the same homemade gravy and wow was I amazed!

Ingredients

3-4 Boneless, Skinless Chicken Breasts

1 package onion soup mix

1 can cream of mushroom soup

1/2 cup water (the old one called for 1/4 but I upped it for more gravy to cover the thicker chicken breasts)


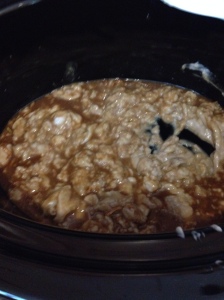
I mixed the water and onion soup mix in the bottom of the crock pot before stirring in the cream of mushroom soup.

Gravy all mixed up and ready!

Gravy all mixed up and ready!

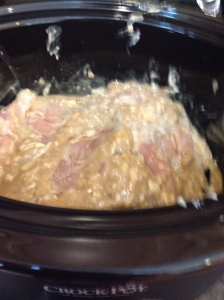
Then I added the chicken breasts and rolled them over a few times to make sure they were well covered.

Chicken cooking in the gravy.

Chicken cooking in the gravy.

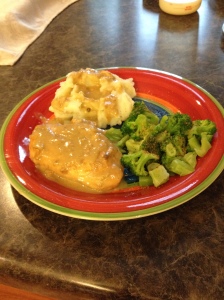
I then set the crock pot to cook for 8 hours but you can set it for what works best for your time limit. After they were done I served them with mashed potatoes and steamed broccoli.

Dinner!!

Dinner!!

These were the most tender, moist, and delicious chicken I have had in a long time! They were so tender you could cut them with a fork! I love how easy the crock pot is and this “homemade” gravy is so easy and soooo delicious!!


Happy Pinning!

Single Serve Chocolate Chip Cookie

99.999% of people love fresh, hot chocolate chip cookies….right? They are so yummy and gooey but, admit it, it can be a lot of work and clean up to get those luscious cookies. Well the pin I found is perfect for those moments when you would kill for a fresh cookie but don’t have the time for a full batch of cookies!

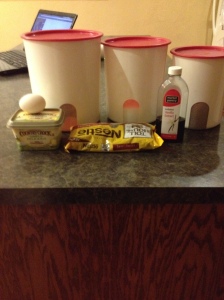
Ingredients

Ingredients

Ingredients

1 tbsp butter

1 tbsp white

1 tbsp brown sugar

1 egg yolk

3 drops vanilla

1/4 flour

1-2 tbsp chocolate chips

pinch of salt (optional)


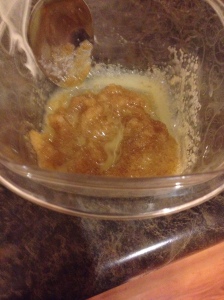
Melt the butter and add the sugars, salt, and drops of vanilla.

Butter, Sugar, and Vanilla

Butter, Sugar, and Vanilla

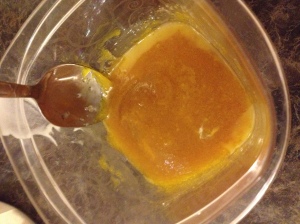
Then add the egg yolk and blend well

Sugars, Vanilla. Butter, Sugar, Salt, and Egg Yolk

After Egg Yolk

Mix in the flour and add the chocolate chips

Finished batter

Finished batter

Microwave 40-60 seconds until done and enjoy!

Hot, Fresh Cookie

Hot, Fresh Cookie

Tips

#1: Start with 40 second then if not done put in for 20 seconds more. I put it in for 60 seconds right away and while it was very good it was a tad overdone and crumbly because it was cooked a tad to long.

#2: I used farm fresh eggs that I get from a co worker and they have dark gold yolks which make baked good look almost neon. So your batter will not be as yellow as mine so do not be worried!

#3 This is very rich so you can split into 2 pieces and top with vanilla ice cream to make a delicious treat!

This was the fastest cookie I have ever made and it was so delicious! It made a lot and my daughter and I were able to share it since it was so rich. It hit the spot nicely and I will be making this again!


Happy Pinning!

Pie Crust

Most people think making a homemade pie crust it so difficult or time consuming so they would rather buy  pre-made ones. I about fell over when I saw how much refrigerated pre-made pie crust cost! It was about $5 for 2 crusts! Buying those graham cracker and/or Oreo ones cost about $4 for 1! Pie crust is not that hard to make nor does it take a long time and it costs less the $1 if you use items you have at home.

Ingredients for Single Crust: 

1/3 cup all purpose flour

1/2 teaspoon salt

1/2 stick Crisco baking stick shortening OR 1/2 cup Crisco shortening…make sure it is cold. Chill it in the fridge for a bit before using it!

3-6 tablespoons cold water

Blend flour and salt together and set aside. If using Crisco baking sticks cut them into small cubes before using. Cut the shortening into the flour using a pastry blender, If you don’t have a pastry blender (I don’t) use a butter knife, until mixture resembles coarse crumbs about pea size.

Cut shortening into flower

Cut shortening into flower

Crust ready for water. See the pea sized lumps of shortening?

Crust ready for water. See the pea sized lumps of shortening?

Sprinkle 3 tablespoons of water onto the flour and shortening mixture then use a fork to mix the water into the flour. Add another tablespoon of water until dough is moist enough to hold together when pressed together. Shape dough into a ball then roll out onto a floured surface until it is the desired thinness. Then fold the dough in half then pick it up and distribute it into the pie pan, make sure not to stretch the dough when unfolding it. Let it rest loosely in the pan.

Formed and ready to roll

Formed and ready to roll

Seeing if the crust is big enough for the pie pan.

Seeing if the crust is big enough for the pie pan.

Ready to fill!

Ready to fill!

Once the crust is in the pan take a fork and gently press against the dough hanging over the edge of the pan to remove the excess. Then you are ready to fill and bake it!

Tips:

#1 For ease in rolling, wrap dough in plastic wrap the chill for 30 minutes but no more then 2 days.

#2 Instead of rolling it out on a floured surface you can place the dough between two sheets of wax paper then roll the pin on top of the wax paper.


This the recipe I use every year to make delicious homemade pumpkin pies for Thanksgiving and Christmas! Happy Pinning!

Snowball Cookies!

Wow have I really been gone that long? How time flies!! Recently work has been very busy and I have had a ton of changes in my life! So I recently haven’t been doing any Pinterest-ing but I do have some things from the holidays to share! I  have had a major lifestyle change and have cleaned up my eating along with doing DDP Yoga (check it out it’s freaking awesome) so anything new I post will be healthier 🙂

Peacan Cookies Ingredients

2 cups flour, all purpose

2 cups finely chopped pecans (any nut really)

1 cup softened butter

Powdered Sugar

Toss everything but the powdered sugar into a bowl and combine, dough will be crumbly.

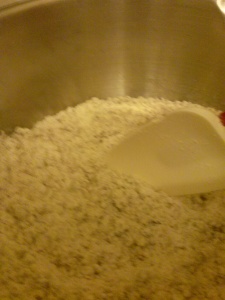
Dry ingredients

Dry ingredients

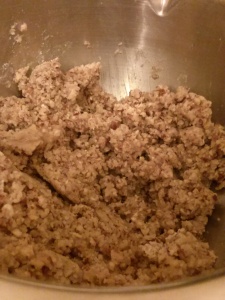
Finished dough

Finished dough

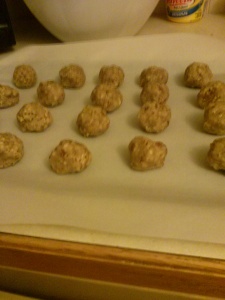
See how crumbly it is? This is normal since there is no egg to really make it stick like other cookie doughs. Scoop dough and form into roughly 1 inch balls and place on a cookie sheet.

Rolled and ready to bake

Rolled and ready to bake

Bake at 325 for 18-25 minutes or until lightly browned. Once out of the oven allow to cool for five minutes then roll them in powdered sugar.

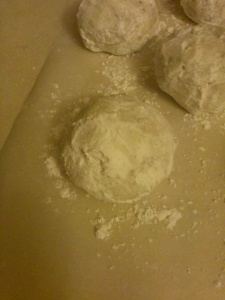
Roll in powdered sugar after baking.

Roll in powdered sugar after baking.

Let them cool completely then roll in a second coat of powdered sugar

After cooling roll again in powdered sugar.

After cooling roll again in powdered sugar

These are very crumbly cookies so don’t be alarmed if they crumble slightly when you roll them around the powdered sugar. These are delicious, melt in your mouth cookies and I love making them! I always will make me a hot chai tea latte and then sit down to enjoy a few while I admire the sparking Christmas lights 🙂

Happy Pinning!

Leftover Chicken Enchiladas

Now the title of this post is rather misleading because I am not talking about eating enchiladas or reheating them the day after. I am talking about how to make chicken enchiladas from leftovers. By now, if you’ve been following my blog, you should know I love to reuse everything because it saves me time and money. One night I was very tired and didn’t feel like cooking nor did I want takeout so I grabbed a rotisserie chicken from a local grocery store. I made sides for it that night (instant potatoes and steamed veggies) and after dinner my boyfriend wanted to toss the chicken remains and I refused to let him.

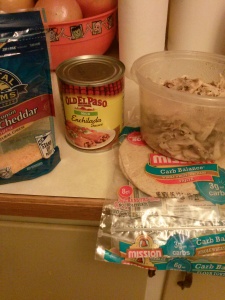
I used:

Enchilada ingriedients

Enchilada ingriedients

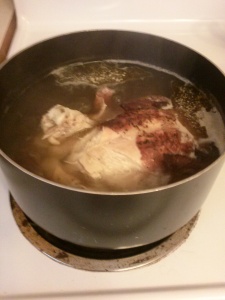
The next day I put the chicken carcass into a pot of water and boiled it until the meat was falling off the bones.

Boiling leftover chicken

Boiling leftover chicken

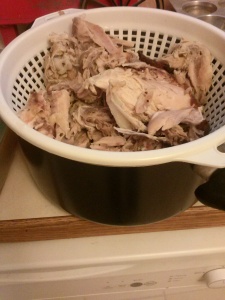
 After the chicken was done I carefully separated the cooked chicken from the stock, I placed the strainer over a pot and drained the liquid into the pot. 

De-boning leftover chicken

De-boning leftover chicken

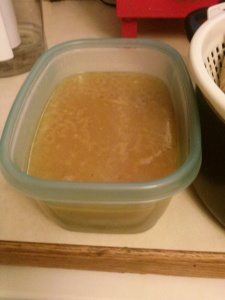
Homemade stock

Homemade stock

Before I started making the enchiladas I took the stock and froze it for later use….I hate wasting anything including homemade stock! I then took the tortillas and made them like any other enchiladas I added a bit of chicken, a bit of cheese, and some enchilada sauce (I used the red sauce). I then lined them all up in a pan and topped with more enchilada sauce and more cheese before baking them at 350 degrees until the cheese was melted and bubbly.

Finished product

Finished product


They turned out so wonderful! Tender meaty chicken rolled up with bubbly cheese and tasty sauce….I love them so much!

Tips from me:

#1 You can use any leftover chicken or you can use fresh chicken breasts/whole chicken…whatever you like. A few days ago (I made these months ago) I made salsa chicken (just a jar of salsa in a crockpot with 4 boneless skinless chicken breasts) for chicken tacos/taco salad. The next day I took those leftovers and made enchiladas with them I just put sauce on the outside since the inside chicken already had salsa. They turned out sooo good too…so any chicken will do!

#2 You don’t have to use flour tortillas. You can use whole wheat tortillas, corn tortillas, or gluten free…whatever you want!

Later I used the homemade stock to make chicken noodle soup. So a $5 rotisserie chicken made 3 meals for me and two of them were just out the remains that most people toss! The only think I tossed from that chicken was the bones! So whenever you have remains of any meal instead of tossing them think about how you could possibly reuse it to stretch your budget further!

Happy Pinning!!
 

Hot Roast Beef Dip Sandwiches

Last night my boyfriend and I finished up moving his things to either my home or the storage shed we rented. I knew at the end I would be to tired to cook so I put a roast in the crock pot for dinner that night. However I was really tired and didn’t even want to make the proper sides for the roast…you know potatoes and veggies. So I put the roast in the fridge and made some quick (i.e. frozen meals) for dinner. So tonight I pulled the roast out and proceeded to make some hot roast beef sandwiches with onion dip.

The inspiration pin: http://bakingbites.com/2008/02/slow-cooker-french-dip-sandwich/

Now since the roast was already cooked and since I didn’t have condensed french onion soup I used the pin for inspiration only.

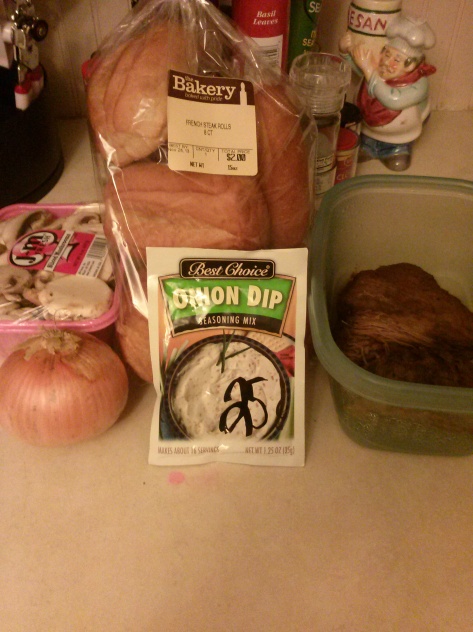
Ingredients:

Roast, onions, mushrooms, French rolls, and powdered onion soup mix.

Roast, onions, mushrooms, French rolls, and powdered onion soup mix.

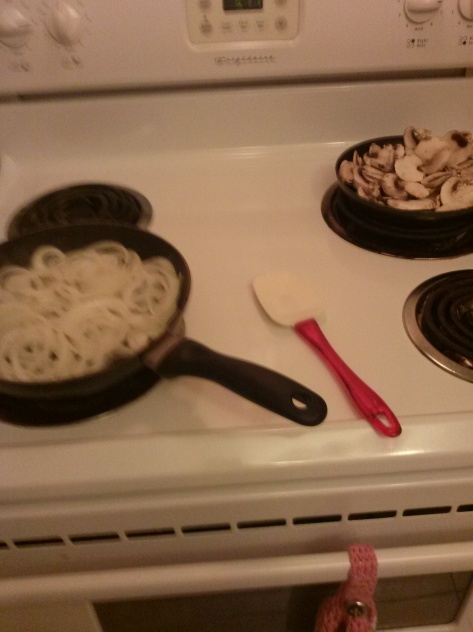
I sliced the onions and combined them with butter in a sauce pan to caramelize them nicely. I did the same thing with the sliced mushrooms so they would sautee nicely in their own pan.

Mushrooms and Onions

Mushrooms and Onions

While these were cooking I put some water in the bowl containing the roast and heated it up in the microwave. Once it was heated up I shredded it and put it aside for later. All the while I was stirring the contents of both pans so nothing would burn then I cooked the onion soup up according to the package directions.

Bread ready to cook

Bread ready to cook (finished onion soup mix in the back.)

I sliced up several french steak rolls and put them in the oven set to 250 degrees and cooked them for 10 minutes, or until crisp. You could heat them up for 20 seconds in the microwave but they turn out soft and chewy…so it’s all about your preferences…I prefer crisp, crusty bread for my dip sandwiches. After everything is cooked and ready to go you can either assemble the sandwiches or serve them smorgasbord style and let everyone make theirs how they like it. I put the cooked ingredients on the table and let my family pile them up how they like it.

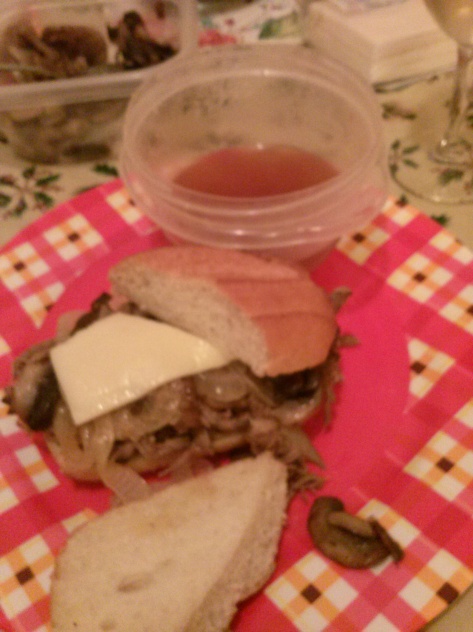
Ready to eat!

Ready to eat!

These were some of the most tasty, tender, and delicious roast beef sandwiches I have ever made. I used to use the drippings of the roast as my dip and I never considered using onion soup mix before. The pin I found used condensed onion soup but I didn’t have that, and as you know I am a fan of using or reusing what you have on hand, but I had powdered onion soup mix. I thought it tasted really, really delicious! I will definitely be using this dip from now on instead of using the roast drippings…or maybe one day I will tinker with using both to get some really flavorful dip!

I hope you enjoy this as much as I do!

Happy Pinning!

10 Tips to Spend Less on Food

I know it has been awhile since I have posted on my blog but life has just been so busy! My boyfriend is moving in with me so we’ve bene working on that then he dislocated his shoulder which has left us in a bind. So we’ve been focusing on the move and almost nothing else! After looking on pinterest I found a post about top 10 tips on how to save on food. Being a frugal person I love this pin and I do several important things on it to keep my own costs down.

The Pin:

Food saving tips

Food saving tips

Tip #2: I always use brown bananas to make banana bread! I don’t know anyone who doesn’t but I never thought about freezing them! A local store always has cheap, brown bananas for super cheap so I may try this once.

Tip #3: I rarely have leftovers because I usually cook just enough for my family because a lot of us don’t like to eat them. If there are leftovers I will take some for lunch the next day but things that won’t taste good reheated I will put out for the strays.

Tip #5: Every Wednesday I get the food ads in the mail so I will look at whats on sale and plan my meals around that. If chicken is on sale for a cheap price, $1.99/lb or less I will buy enough for 2 weeks worth of meals. I also combine this tip with #4 and use items on sale this week with items I got for cheap last week. It works well and saves me a lot of money every week/month/year. I also combine these sales with tip #10 and get things on sale then use coupons on them to pay a lot less. This week target has Campbell’s cream of mushroom soup for $0.69 and I have a coupon for $0.40/4 and 5% off so for 4 cans I will pay $2.22 (about $0.50 each).

Tip #6: This tip also gets combined with #5 in those weekly ads you will see cheap produce on sale and the cheaper items are the ones in season. Also in the fall I will go to local markets like an Amish store or the local farmer’s market for cheaper, local fresh produce.

Tip #7: I don’t think I have ever done a meatless meal….I love my chicken, pork and fish lol!!
Tip #8: This is a good tip but I don’t make a list I have a rotation system in my freezer. I have my packages of chicken on one shelf and when I get more I pull the older ones to the front and put the newer ones behind them. So when I grab a package in the front I know it’s the older ones. I also will date the packages, sometimes with a date, but at times I get to lazy for this lol!

Tip #9 and #10: I will buy generic foods but often times I find I can get name brands for cheaper with coupons and sales. I haven’t had a good trash bag deal so I got the Target brand and used a 5% off to get some cheap bags. As for coupons….I could write a whole post on this!! Now I am not extreme…most legit coupon users find this to be an insult…I am a logical coupon user. I make sure to use them on the right things and never try to cheat the system! Target is the best place to shop since they have their own coupons on their site, you can use Sunday paper coupons, get their debit card to get 5% off, use their mobile q’s, and their new Cartwheel which gives you % off items. So I can clean up there lol!! I often save thousands of dollars by using coupons matched with sales and gift card deals!!

I love this list of tips since it can save you lots of cash! I am a big fan of saving money, using coupons, and by reusing items you have at home! I never realized how much I do this until I cleaned out my boyfriend’s deep freeze, freezer, fridge and pantry durin the moving process! He had so much expired foods in vast quantities…it looked like he forgot he had certain things in back so he bought more. The deep freezer was the worst he would just pile fresher foods on top of the old foods (he has a chest freezer mine is an upright) and by the time I got to the bottom of it he had food from 2007!!! Thankfully we agreed that I would do all the shopping for us lol!! Hope you  like the tips!!

Happy Pinning!

Pumpkin Puree Part 2

In another post I covered how to make your own purred pumpkin for cooking and in it I said:

“I found nicer, darker pie pumpkins at a local market that sells Amish and Mennonite produce (they were $1.49 each) and I will bake them today but I don’t expect much change.”

Well I cooked some up recently that were a nice dark color and the puree they made was so much better then the pale ones at the grocery!

Nice dark pumpkin.

Nice dark pumpkin.

I cooked them according to my old post (here: https://aradiasilvermoon.wordpress.com/2013/09/29/pumpkin-puree/) and pureed them in my food processor. The puree came out so nice and dark! You could definitely tell the difference!

Freshly pureed

Freshly pureed

Fresh puree packaged for freezing.

Fresh puree packaged for freezing.


Old vs. New

Old vs. New

In this photo you can see the old, pale puree laying on top of the darker, newer pumpkin. Now I know you are thinking did it really make any difference? In cooking no it didn’t but the darker puree had a richer taste to it…hard to describe…but it was better tasting.  Another problem I ran into was after packaging them in baggies it was difficult to get the puree out and some got stuck. Since I measured these out at precisely the amount needed for the items I was making leaving some behind wasn’t ideal. Then I came up with an idea on how to get the puree out without leaving any behind! I cut the end off the baggie and slowly squeeze out every drop, if you have ever iced cakes this way then it’s the same concept.

Pumpkin out of a baggie

Pumpkin out of a baggie

So when making your own puree I would recommend getting the darkest pumpkins so you can get that dark, rich tasting puree for your baked goods! The pale puree works great too and tastes good, so much better then canned versions, so either way it’s a healthy and tasty addition to your cooking!

Happy Pinning!

Homemade Hot Chocolate

Now that it’s getting colder there are three things I love to make!

#1:  Homemade soups, stews, and chili! Nothing better then curling up on the couch on a cold day with a movie and a homemade bowl of yummyness!

#2 Fresh baked goodies! I love how the oven warms up your home on those cold days and how the scents make your home smell so good!

and

#3: Hot drinks! Normally I make tea or packaged hot cocoa but I remember making homemade cocoa with my mom when I was young. So I decided to make my own!

The pin:

http://simple-nourished-living.com/2011/02/hot-chocolate-recipe/


Ingredients:

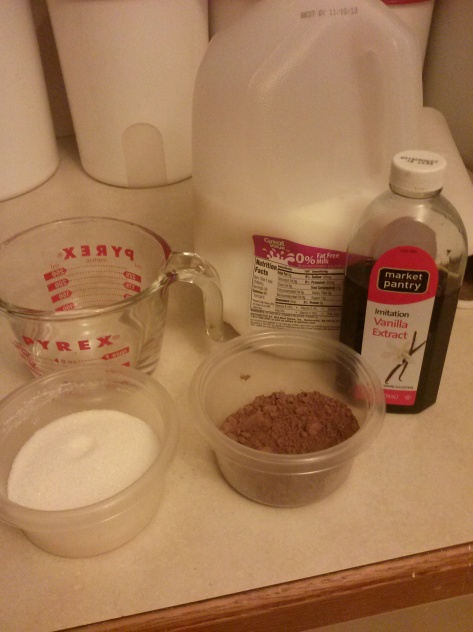
Ingredients

Ingredients

1/2 cup sugar

1/3 cup unsweetened cocoa

1/3 cup hot water

3/4 teaspoon vanilla

4 cups milk

dash of salt (optional)

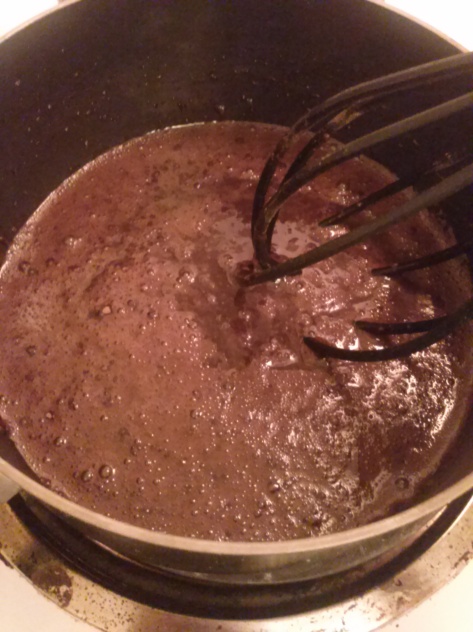
Mix sugar, water, and cocoa in a saucepan and cook until boiling, make sure to stir constantly! After mixture comes to a boil continue to stir it and let it boil for 2 minutes.

Cocoa, water, and sugar boiling.

Cocoa, water, and sugar boiling.

After the two minutes is up add the 4 cups milk and heat to desired temperature. But DO NOT let it boil!

Milk added

Milk added

Once it is at the temperature you like remove from heat, add vanilla and whisk until foamy. Top with whipped cream, marshmallows or whatever you like!

Tips from me

#1 I had a few snack sized Hershey’s chocolate bars laying around so I had Alison, my daughter, chop them up into bits. Then we sprinkled a little in the bottom of our mugs before adding the hot chocolate. The we stirred it up and wow it added just a little something extra to the already amazing drink! You can also add the grated up chocolate to the sauce pan instead of putting it in your cups like we did!

Secret ingredient!

Secret ingredient!

Ready to drink!

Ready to drink!


Everyone loved this drink and we all agreed that this was WAY better then the packaged mixes! It was so tasty we didn’t have any leftovers! This is my new favorite fall/winter drink and it wasn’t any harder then making packaged mix! Alison couldn’t get enough of it, as shown below, and wants to know when we’ll be making more!

Yummy!!

Yummy!!

Happy Pinning!