Homemade Hummus

I love hummus! I go though a family sized dish of Sabra hummus, either classic (plain) or red pepper, every two weeks at about $5 each. After awhile that gets really pricey so I started looking into making my own! The recipe I had sounded easy enough and bonus I had everything at home except the tahini!

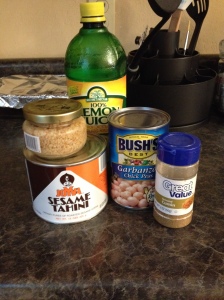
Ingredients

Ingredients

Ingredients


One 15-ounce can (425 grams) chickpeas, also called garbanzo beans

1/4 cup (59 ml) fresh lemon juice, about 1 large lemon

1/4 cup (59 ml) tahini (we used Krinos)

Half of a large garlic clove, minced

2 tablespoons olive oil, plus more for serving

1/2 to 1 teaspoon kosher salt, depending on taste

1/2 teaspoon ground cumin

water

First you take your tahini and lemon juice and blend it in your food processor for about 30 seconds. Then scrape the sides and bottom of the bowl then process for another 30 seconds. Next add garlic, olive oil, cumin, and salt to the bowl and blend another 30 seconds. Open the canned chickpeas rinse then drain before adding them to the bowl and process for 1 minute.  Stop and scrape the sides and bottom of the bowl then process for another 1-2 minutes. Add a bit of water if the hummus is to thick of if there are chunks of chickpeas while processing. Once it has reached a nice smooth consistency you are done!

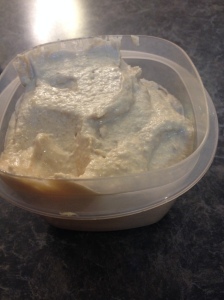
My first batch is done!

My first batch is done!

Tips:

#1 I didn’t like how the cumin tasted so in my second batch I halved the amount and it came out so yummy!

#2 By  my second batch the finished product was a lot smoother thanks to a friend’s feedback. They said “with hummus process it until you think it is done…then process for another minute” either way you get a wonderful smooth product.

#3 I didn’t have a garlic clove on hand but I had some jarred minced garlic in the fridge so I used a tablespoon of that instead.

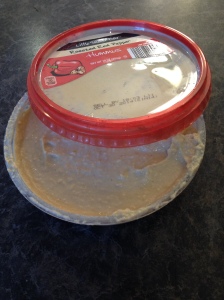
Before I made this I bough some generic off brand hummus because it was cheaper then Sabra. Well it was nasty and I was out the $2 but I washed out the bowl and now I store my hummus in it! That way everyone knows where the hummus is instead of looking at a tupperware bowl and going “What is this??????” lol.

reusing a dish

reusing a dish

General Cost:

Chickpeas $0.74 ( Market Pantry brand found at Target)

Tahini (I used Joyva brand) $6.24

Garlic clove $0.50

Lemon Juice $1.79

Total: $9.27 For about 7 batches or $1.32 instead of $5 like name brand hummus!

The tahini can had 15 oz and 1/4= 2 oz so you will get about 7 batches from the 15oz can or $0.89 a batch! Another way to reduce costs is to use what you have on hand in the fridge and pantry!
 

Almost Homemade Turkey Italian Sausage with Chunky Sauce

To me almost homemade means taking pre-made items from the store and making a delicious home cooked meal. Many times over I have gotten items free with my coupons and will use them to make delicious meals. 

Ingredients for 2 Italian Sausages

1/2 package Bird’s Eye peppers and onions (I picked out the onions since I hate them)

2 Jennie O I Turkey Italian Sausage 

1 cup pasta sauce

1/2 package fresh sliced mushrooms

If you want to make the whole package of sausages then simply double the recipe! 

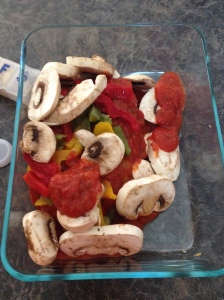
I thawed out the peppers and onions before hand to speed up the cooking time. I browned the sausages in a pan before placing them in a glass baking dish. I put the mushrooms, peppers and onions, and pasta sauce on top of the sausages.

Sausage, vegetables, and sauce.

Sausage, vegetables, and sauce.

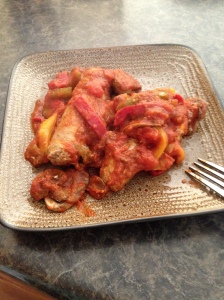
I baked at 350 degrees until the sausages were cooked through, making sure to check occasionally to stir the veggies and sauce so the veggies didn’t get dried out. Add more sauce if needed to keep everything juicy and tender. 

Finished and ready to eat!

Finished and ready to eat!

After they were done I simply put them on a plate to eat as and entree. However you can cut them put and pour over noodles, spaghetti squash, zucchini “noodles” etc.

Tips:

#1 You can use fresh peppers if you wish or any vegetables you want/have on hand. I like to use things already in the fridge, freezer, and pantry to decrease costs. 

#2 You can use any Italian sausage you want if you do not like turkey. 

#3 I am sorry that I don’t have appropriate cook times but the 3 times I have made this it has taken different amounts of time. I simply check and stir everything up until it is fully cooked.


Baked Spaghetti Squash

I love eating spaghetti squash with my pasta sauce so much now I doubt I will ever eat pasta again! But I have never cooked it myself….until now! The few times I have had it my mom has baked it and I have either #1 eaten it at her house or #2 taken some of her already cooked and frozen squash home with me. So while we were out at the local pumpkin patch I bought up both a nice spaghetti squash for about $1.50 each. Tonight I ate the last bit of the frozen squash I had left so I decided tonight I would cook the one I had at home.

The pin:

http://inspireandindulge.wordpress.com/2013/01/03/paleo-spaghetti-squash/

To bake the squash you cut it in half lengthwise and clean out and dispose of the goopy guts! Then place the squash skin side up on an oiled cookie sheet. Some people use olive oil, salt, and pepper on the squash before baking it. However I just spray some Pam for baking on the cookie sheet and bake it like that,

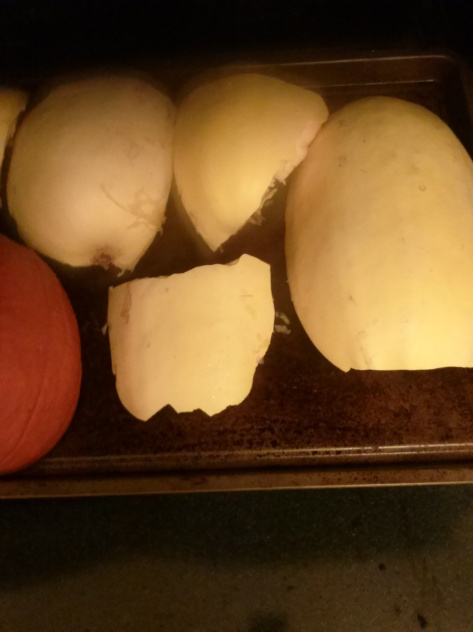
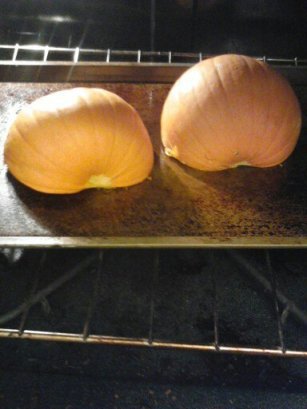
Well the squash has a really thick skin and it was impossible for me to cut it so I asked my boyfriend to help me. By the time I got it in the oven it looked like this:

Pieces ready to bake.

Pieces ready to bake.

The poor thing was in about 5 pieces and, as you can see, I had about half a pumpkin to roast too.  So I put it in the oven on 350 degrees for an hour. You’ll know it’s ready when you can easily prick the flesh with a fork.

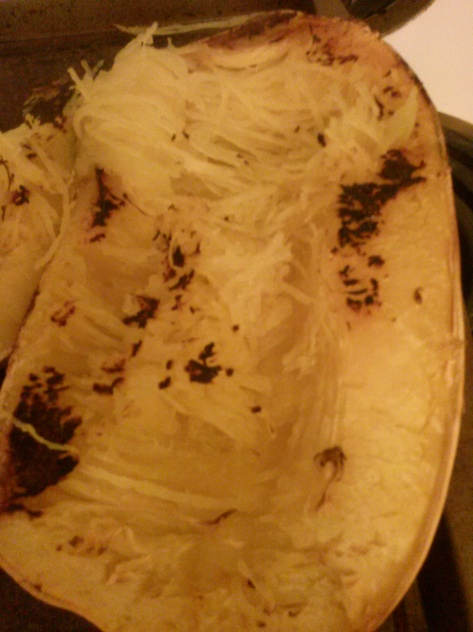
Cooked!

Cooked!

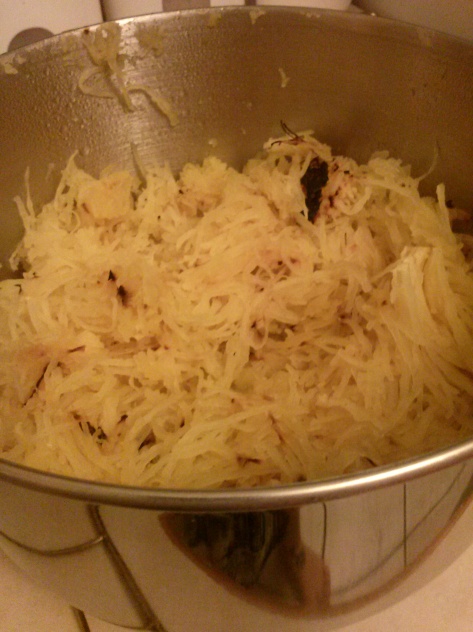
Ready to eat!

Ready to eat!

Once it’s cooked use a fork to scoop out the flesh, it will come out in strings hence the name spaghetti squash. After this you can use it for any recipe from spaghetti squash au gratin or put spaghetti sauce over it. It’s delicious!

Tips from me:

#1 After it cools down I intend to measure it out in 1/2 cup fulls, place in individual baggies, and then freeze it until I am ready to use it!

#2 Remember when roasting any squash the time may vary due to the size. Bigger, thicker ones take longer and the smaller ones will cook quicker.

Happy Pinning!

Healthy Crock Pot Meatballs

I love my crock pot because there is nothing better then coming home at the end of the day and dinner is done! You just add ingredients, set the time, and it takes care of the rest! Love it! So I am ALWAYS on the hunt for new recipes for my crock pot. I used to just use it to cook roast. stews, and cream of mushroom chicken but other then that I had no idea what to do. Now thanks to Pinterest I can find TONS of recipes and I can use my much loved crock pot more! I found this yummy sounding meatball recipe and I just had to make it! Meatballs are so versatile! You can make sandwiches with the, put them on noodles for spaghetti, eat alone, or put on spaghetti squash!

The Pin:

http://glow.beautygala.com/healthy-crock-pot-meatball-recipe/

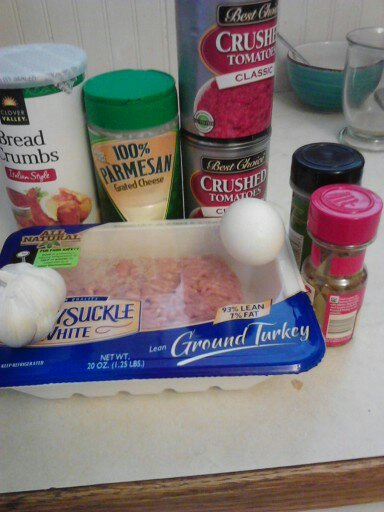
Ingredients:

1lb ground turkey (you can use any ground meat chicken, pork, or cow)

1 egg

1/4 cup Italian breadcrumbs

1/4 Parmesan cheese

4 garlic cloves

2 28oz crushed tomatoes

Italian seasoning

2 bay leaves

salt and pepper to taste

Ingredients

Ingredients

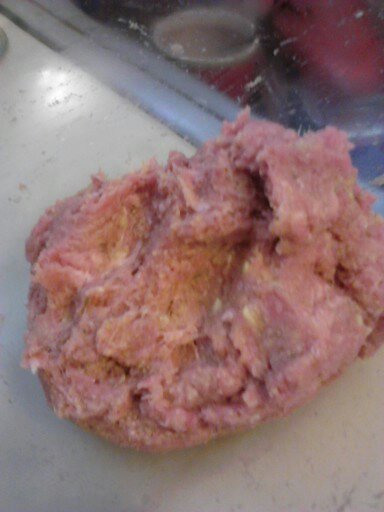
Combine ground meat, bread crumbs, Parmesan cheese, egg, and 2 cloves chopped garlic in a bowl. Mix the ingredients with your hands (do not over mix because it will  make the meatballs tough). Then create (with your hands) meatballs the size of a tablespoon, you can vary the size depending on your taste.

Meat mixture ready to form.

Meat mixture ready to form.

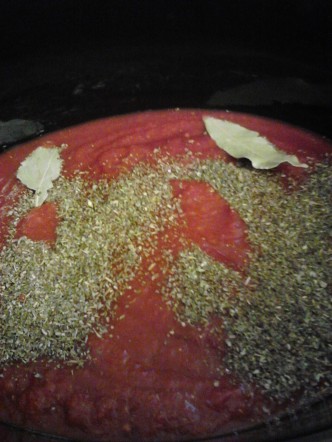
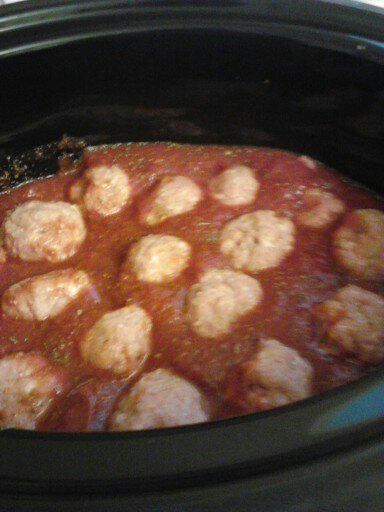
In the crock pot place the two cans of crushed tomatoes and the 2 bay leaves then add 1 tablespoon of Italian seasoning. Add the meatballs on top of the tomato mixture then add the other 2 garlic cloves, you can mince them if you want.

Tomatoes, bay leaves, and Italian seasoning.

Tomatoes, bay leaves, and Italian seasoning.

Cook on high for 5-6 hours or on low for 8-10 hours, Salt and pepper to taste before serving.

Ready to cook.

Ready to cook.

All done and looking so yummy!

All done and looking so yummy!


Tips from me:

#1 I cooked these on high for 4 and half hours and it was delicious but next time I will cook on low for the 8-10 hours. By letting it simmer longer it will give the flavors longer to mingle and should taste amazing.

You can serve these on spaghetti noodles, on a sandwich, brown rice, or over vegetables like spaghetti squash or zucchini. I love spaghetti squash so I had mine this way and it was so yummy! I love how these turned out they were so light, tender, and flavorful these will become a staple in my family from now on! Plus the ingredients are so cheap and made of things I already have in my pantry and freezer. You should know by now I am all about using what you have on hand and things you can get on sale like the ground turkey! Since I bought the bread crumbs for this recipe alone so I know for a fact I will be making it again, and again until these are gone lol!

Enjoy and Happy Pinning!

Homemade Pumpkin Puree

After making the steel cut pumpkin pie oats and the homemade pumpkin bread I had to break down and buy some more pumpkin so I could continue my cooking. But what I found shocked me! The canned pumpkin was $1.99 for generic and around $2.xx for name brand! I was astonished and decided I wouldn’t buy any! When I got home I looked on my pinterest and I found a how to on making your own pumpkin puree for use in recipes. I also like the idea of making my own because it won’t have any dyes, preservatives, or other artificial ingredients in it!

The pin: 

http://dailysavings.allyou.com/2012/09/24/pumpkin-cooking/

I went to a local grocery store and found they had pie pumpkins on sale for $0.89 and I bought two for under $3. The are a lot smaller then carving pumpkins, you should use pie pumpkin because they have a better taste to them. First you cut them in half legthwise (start at the stem and cut until you reach the stem again. After cutting it scoop out the seeds and put them aside (I am going to roast them for the first time tonight and post about it tomorrow) in a bowl of water.

Cut, scooped, and ready to bake.

Cut, scooped, and ready to bake.

Place both halve cut side down on a lightly oiled baking sheet and cook on 350 degrees the time ranges due to several factors. My tiny ones cooked up in 45 minutes but it can take up to 2 hours depending on size and density.

Baking

Baking

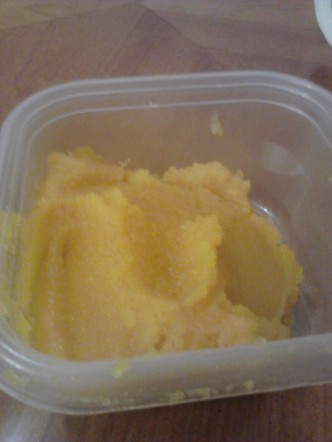
After they are cooked fully the flesh should scoop out easily, if not place back in over and cook longer. Wait until the pumpkin is cooled then scoop out the flesh and place into a bowl and toss the rinds in the trash, or compost. The pin said to mash it up but I had trouble and couldn’t mash it well enough so I dumped into a food processor until it was all smooth.

Pumpkin puree

Pumpkin puree

I baked two pumpkins and got around 3 cups of puree and since the bread calls for one and a half cups I measured out that amount. I put some into the fridge then froze the rest. I found nicer, darker pie pumpkins at a local market that sells Amish and Mennonite produce (they were $1.49 each) and I will bake them today but I don’t expect much change. I asked my mom about how pale the pureed pumpkin was compared to the canned pumpkin (she makes her own canned pumpkin) and she said the color didn’t matter. She said the products I made would be paler in comparison (to canned products) but taste the same since pumpkin has really no taste of it’s own…it’s the spices that make the taste. So don’t be frightened if your puree is pale too.  So for under $3 I got enough pumpkin for 2 loaves of bread compared to $2.xx for one can which would only make one loaf! It was super easy and unless I can find a crazy good deal on canned pumpkin I will make my own!

Happy Pinning!

Sizzling Fajitas and Homemade Guacamole

Looks like the post on homemade pop tarts will have to wait a bit longer…dang it! I discovered I don’t own a rolling pin so I froze the dough until I can buy one, payday is Monday, and finish them off! So tonight I found myself home alone, the kid is at a game and my boyfriend is fixing his daughter’s car, and I decided to make one of my favorite dishes…chicken fajitas!

The pin: http://www.foodnetwork.com/recipes/paula-deen/gold-medal-sizzling-fajitas-recipe/index.html

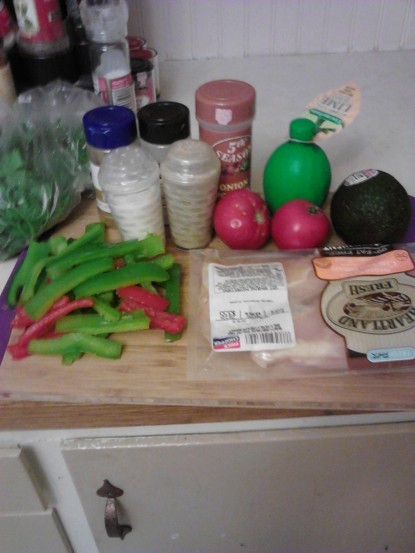
Ingredients ready to cook!

Ingredients ready to cook!

Marinade:

1/4 cup vegetable oil, divided
3 tablespoons lemon juice
1 garlic clove, minced
1 teaspoon ground cumin
1 teaspoon garlic powder
1 teaspoon onion powder
Dash hot sauce
Salt
Freshly ground black pepper

mix in plastic bag then add your meat and chill (15 minutes for shrimp, 20 minutes for chicken and 1 hour for skirt steak.)

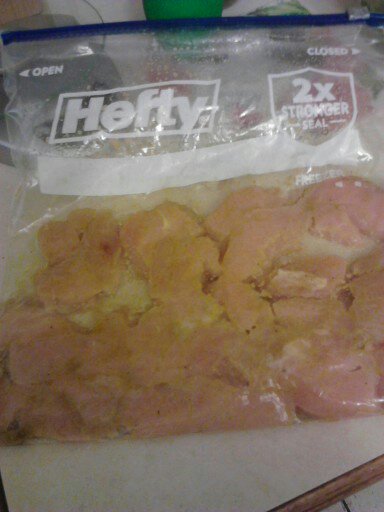
Marinating chicken

Marinating chicken

While the chicken chilled for 20 minutes I decided to make some homemade guacamole. Now I don’t have a pin for the guacamole because I already know how to make it…thanks to my sister Jessica! It is so delicious!


Guacamole

1-5 Avocados (depending on how much guacamole you want)

diced tomatoes or onions (depending on how chunky you want your guacamole)

lime juice, salt, and chopped cilantro

Mash the Avocados in a bowl and add the tomatoes and onions, mixing well. Add cilantro, lime juice, and salt making sure to taste as you go until you get the desired taste.

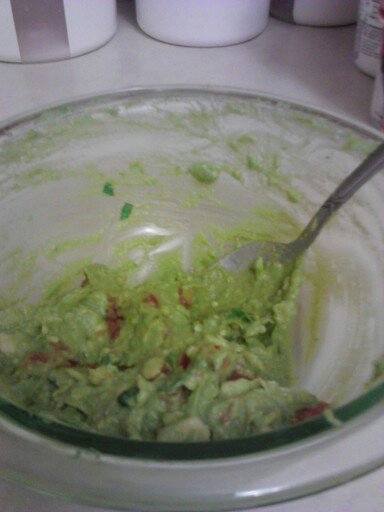
Guacamole ready to eat!

Guacamole ready to eat!

Chill the guacamole while you cook the chicken, peppers, and onions in a hot frying pan. Serve with warm tortillas, guacamole, sour cream or any other sides you desire!


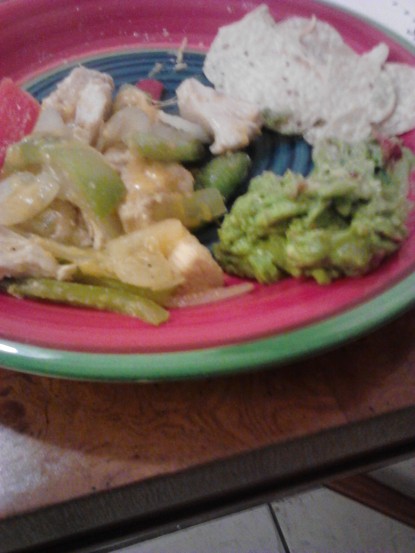
Plated and ready to eat!

Plated and ready to eat!

I discovered I didn’t have tortillas so I had some chips on the side for the guacamole and I ate the filling alone. It was so delicious!

Tips from me:

#1 I was unable to get the meat to brown much because the recipe has you put it on heated chargers, like at a restaurant. So I would increase the temperature next time to get it to brown better.

Happy pinning!

Oven Baked Corn on the Cob

It’s been awhile since my last post but I used everything I had at the time and I didn’t have the ingredients for other things! I just went shopping and I got all the items I need to cook up some yummy pins! I am now I am back on track and I can’t wait to try some of these yummy looking foods!

OK back to blogging!!

I love, love, LOVE grilled corn on the cob! It’s so buttery, yummy, and just the right amount of crunch to soft ratio…just delicious! However I have absolutely no idea how to run a grill so I don’t get it very often. But one day I really wanted some grilled corn, like badly, so I hit the internet and Pinterest and I fount his WONDERFUL, lifesaving pin!

The pin: http://workinghousemomwife.blogspot.ca/2012/07/baked-corn-on-cob.html?m=1

It was so easy I can’t believe I didn’t know about it! All you do is take some corn, leave the husk on, rinse with water, and bake at 350-400 degrees!  When I pulled them out of the oven I let them sit a minute or so to cool slightly then I put on over mitts and slid the husks and silk off. I buttered them and added some seasoning (I use Weber’s Veggie Grill) and they were just so tender and perfectly steamed! Everyone agreed they were very tasty, better then boiling in water.

Tips from me:

#1 I found two pins with separate cooking times, hence the 300-450 degrees in the instructions, so once you know your oven you can pick your ideal temperature.

#2 You can peel back the husk slightly to add butter and seasoning so they come out already buttery but remember to seal the husks back up so they can steam properly!

Happy Pinning!!