I love hummus! I go though a family sized dish of Sabra hummus, either classic (plain) or red pepper, every two weeks at about $5 each. After awhile that gets really pricey so I started looking into making my own! The recipe I had sounded easy enough and bonus I had everything at home except the tahini!
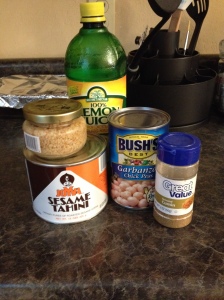
Ingredients
Ingredients
One 15-ounce can (425 grams) chickpeas, also called garbanzo beans
1/4 cup (59 ml) fresh lemon juice, about 1 large lemon
1/4 cup (59 ml) tahini (we used Krinos)
Half of a large garlic clove, minced
2 tablespoons olive oil, plus more for serving
1/2 to 1 teaspoon kosher salt, depending on taste
1/2 teaspoon ground cumin
water
First you take your tahini and lemon juice and blend it in your food processor for about 30 seconds. Then scrape the sides and bottom of the bowl then process for another 30 seconds. Next add garlic, olive oil, cumin, and salt to the bowl and blend another 30 seconds. Open the canned chickpeas rinse then drain before adding them to the bowl and process for 1 minute. Stop and scrape the sides and bottom of the bowl then process for another 1-2 minutes. Add a bit of water if the hummus is to thick of if there are chunks of chickpeas while processing. Once it has reached a nice smooth consistency you are done!
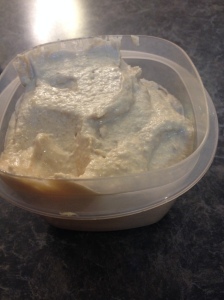
My first batch is done!
Tips:
#1 I didn’t like how the cumin tasted so in my second batch I halved the amount and it came out so yummy!
#2 By my second batch the finished product was a lot smoother thanks to a friend’s feedback. They said “with hummus process it until you think it is done…then process for another minute” either way you get a wonderful smooth product.
#3 I didn’t have a garlic clove on hand but I had some jarred minced garlic in the fridge so I used a tablespoon of that instead.
Before I made this I bough some generic off brand hummus because it was cheaper then Sabra. Well it was nasty and I was out the $2 but I washed out the bowl and now I store my hummus in it! That way everyone knows where the hummus is instead of looking at a tupperware bowl and going “What is this??????” lol.
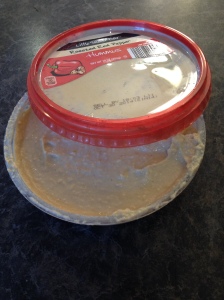
reusing a dish
General Cost:
Chickpeas $0.74 ( Market Pantry brand found at Target)
Tahini (I used Joyva brand) $6.24
Garlic clove $0.50
Lemon Juice $1.79
Total: $9.27 For about 7 batches or $1.32 instead of $5 like name brand hummus!
The tahini can had 15 oz and 1/4= 2 oz so you will get about 7 batches from the 15oz can or $0.89 a batch! Another way to reduce costs is to use what you have on hand in the fridge and pantry!