Pill Sorting Activity

I am an Occupational Therapist Assistant. I know most everyone is now like “Is that like Physical Therapist?” or “You help people work?”. I am part of a rehabilitation team and I work to get elderly patients home. I work on getting them back to doing things like dressing, toileting, and standing balance. One of the things people have to do upon returning home is to take their meds and learn to keep them straight. I made a pill sorting activity tonight that I can take with me to teach people how to properly sort their pills.

I found a pill label template  and I edited the contents of the labels to make it easy for my patients.

finished bottles.

finished bottles.

I only included the name of a fake pharmacy, a joke doctor name (See one says Donna Noble…a la Doctor Who lol), real drug name and when to take it. I filled them with different colored beads and included an empty pill box for them to  sort the “pills” into. I then used scotch tape to fasten them to the bottle then layer other strips to “laminate” it to the bottle. Done!

Now you don’t have to use this for a therapy job! I have found many uses like party favors (filled with candy)….joke gifts…and many other! It’s a fun, simple activity that had multiple uses! Make labels for chill pills, happy pills, fun pills and fill them with candy and hand out to friends/family! Go crazy and have fun with it!

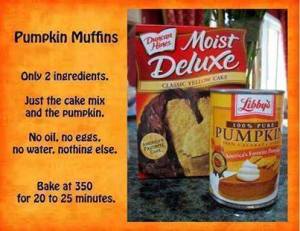
Pumpkin Muffins

My friend Andrea posted a photo on her Facebook page with me tagged in it that she thought I would like…since she knows of my pumpkin obsession!

Ingredients

recipe

Instead of a yellow cake mix I used a spice cake since it had….well spices in it! I thought it would be comparable to what is used in pumpkin pie.
Ingredients

Ingredients

I just did like it said and mixed the pumpkin into the cake mix and put 1 and 1/2 scoops into a muffin tin lined with papers. The can of pumpkin in the picture is 15oz and since I make my own puree I measured out that amount.

filled and ready to bake!

filled and ready to bake!

cooked and cooling.

cooked and cooling.

I just tasted one and OMG they are so delicious! They came out light, fluffy and tasting just like pumpkin bread/roll/pie etc….so very good! Yummy! I suppose you could top with frosting (for the ones I made cream cheese frosting came to mind) but then they’d be cupcakes…right? I highly recommend this very easy and delicious recipe!

Homemade Hummus

I love hummus! I go though a family sized dish of Sabra hummus, either classic (plain) or red pepper, every two weeks at about $5 each. After awhile that gets really pricey so I started looking into making my own! The recipe I had sounded easy enough and bonus I had everything at home except the tahini!

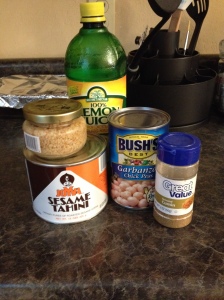
Ingredients

Ingredients

Ingredients


One 15-ounce can (425 grams) chickpeas, also called garbanzo beans

1/4 cup (59 ml) fresh lemon juice, about 1 large lemon

1/4 cup (59 ml) tahini (we used Krinos)

Half of a large garlic clove, minced

2 tablespoons olive oil, plus more for serving

1/2 to 1 teaspoon kosher salt, depending on taste

1/2 teaspoon ground cumin

water

First you take your tahini and lemon juice and blend it in your food processor for about 30 seconds. Then scrape the sides and bottom of the bowl then process for another 30 seconds. Next add garlic, olive oil, cumin, and salt to the bowl and blend another 30 seconds. Open the canned chickpeas rinse then drain before adding them to the bowl and process for 1 minute.  Stop and scrape the sides and bottom of the bowl then process for another 1-2 minutes. Add a bit of water if the hummus is to thick of if there are chunks of chickpeas while processing. Once it has reached a nice smooth consistency you are done!

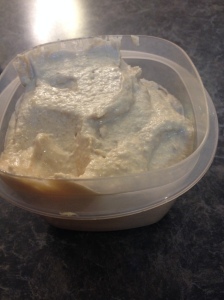
My first batch is done!

My first batch is done!

Tips:

#1 I didn’t like how the cumin tasted so in my second batch I halved the amount and it came out so yummy!

#2 By  my second batch the finished product was a lot smoother thanks to a friend’s feedback. They said “with hummus process it until you think it is done…then process for another minute” either way you get a wonderful smooth product.

#3 I didn’t have a garlic clove on hand but I had some jarred minced garlic in the fridge so I used a tablespoon of that instead.

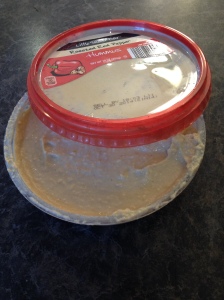
Before I made this I bough some generic off brand hummus because it was cheaper then Sabra. Well it was nasty and I was out the $2 but I washed out the bowl and now I store my hummus in it! That way everyone knows where the hummus is instead of looking at a tupperware bowl and going “What is this??????” lol.
reusing a dish

reusing a dish

General Cost:

Chickpeas $0.74 ( Market Pantry brand found at Target)

Tahini (I used Joyva brand) $6.24

Garlic clove $0.50

Lemon Juice $1.79

Total: $9.27 For about 7 batches or $1.32 instead of $5 like name brand hummus!

The tahini can had 15 oz and 1/4= 2 oz so you will get about 7 batches from the 15oz can or $0.89 a batch! Another way to reduce costs is to use what you have on hand in the fridge and pantry!


Almost Homemade Sausage Cheese Biscuits

My boyfriend likes to eat these sausge rolls from a local bakery and/or sausage cheese biscuits from McDonald’s. Only problem is they cost a lot of money in the long run so I thought of a way to make portable breakfast pockets at home!

Ingredients:

Ingredients

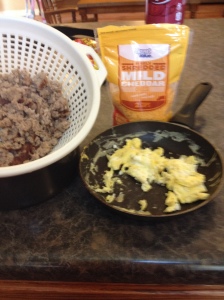
Filling Ingredients (biscuits not pictured)

1 roll 10ct biscuits (I used Best Choice Texas Style)

cooked, crumbled up sausage

shredded cheese

scrambled eggs (optional)

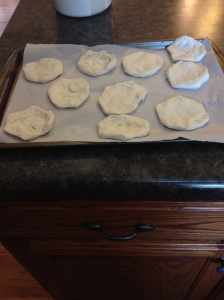
Line a cookie sheet with parchment paper and press the biscuits down flat.

Pressed dough

Pressed dough

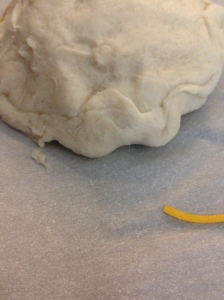
The I topped half of the dough with a mixture of sausage, cheese, and/or eggs.

Filled dough

Filled dough

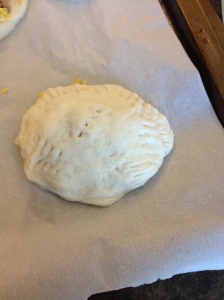
Once you’ve filled them enough top with the other dough circles and seal them up.

Rolled edges

Rolled edges

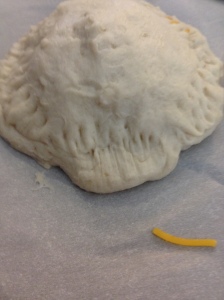
First I rolled the edges of the bottom dough up and over onto the top layer.

Crimped edges

Crimped edges

Use fork to crimp all around the rolled edges making sure they are sealed up tight. Pierce the tops of the rolls (to vent steam if needed) and then spread with butter and top with salt.

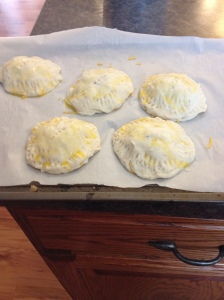
Brushed with butter and a sprinkle of salt.

Brushed with butter and a sprinkle of salt.

Poke holes

Poke holes

I then baked them according to the biscuit package.

Almost Homemade Sausage Biscuits

Finished and ready to eat!
 

Alterations/Tips

#1 I made these a few weeks back and when they came out the biscuits puffed up quite a bit more then I expected since I had pressed them flat.

Yummy!
Yummy!

Since they puffed up then the ratio of bread to filling was off and there was barely any filling. So next time I make these I will use a rolling pin and roll the dough out until it’s 1/8 inch thick, or as thin as I can get them without breaking the dough.

#2 I also plan on using cooked sausage patties instead of crumbled sausage since it will fill it up easier. My boyfriend likes those pre-made banquet sausage patties so I will use those.

#3 You can use any filling you want like ham, eggs, cheese, hash browns, bacon…the possibilities are endless!

My boyfriend said these were good and I plan on making them for his breakfast so he can eat on the go and save us money in the long run!

Almost Homemade Turkey Italian Sausage with Chunky Sauce

To me almost homemade means taking pre-made items from the store and making a delicious home cooked meal. Many times over I have gotten items free with my coupons and will use them to make delicious meals. 

Ingredients for 2 Italian Sausages

1/2 package Bird’s Eye peppers and onions (I picked out the onions since I hate them)

2 Jennie O I Turkey Italian Sausage 

1 cup pasta sauce

1/2 package fresh sliced mushrooms

If you want to make the whole package of sausages then simply double the recipe! 

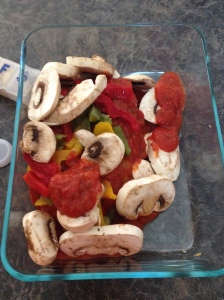
I thawed out the peppers and onions before hand to speed up the cooking time. I browned the sausages in a pan before placing them in a glass baking dish. I put the mushrooms, peppers and onions, and pasta sauce on top of the sausages.

Sausage, vegetables, and sauce.

Sausage, vegetables, and sauce.

I baked at 350 degrees until the sausages were cooked through, making sure to check occasionally to stir the veggies and sauce so the veggies didn’t get dried out. Add more sauce if needed to keep everything juicy and tender. 

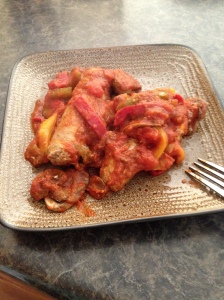
Finished and ready to eat!

Finished and ready to eat!

After they were done I simply put them on a plate to eat as and entree. However you can cut them put and pour over noodles, spaghetti squash, zucchini “noodles” etc.

Tips:

#1 You can use fresh peppers if you wish or any vegetables you want/have on hand. I like to use things already in the fridge, freezer, and pantry to decrease costs. 

#2 You can use any Italian sausage you want if you do not like turkey. 

#3 I am sorry that I don’t have appropriate cook times but the 3 times I have made this it has taken different amounts of time. I simply check and stir everything up until it is fully cooked.


Almost Homemade Roast Beef Sandwiches

My sister once brought up almost homemade when I was using a frozen meal and jazzing it up to serve at a family reunion. One night I was wanting some hot roast beef sandwiches like these: Hot Roast Beef Sandwiches. However I didn’t have any roast cooking in the crock pot but then I came up with an idea.

Ingredients

1 package Oscar Mayer sliced roast beef lunch meat

1 package fresh mushrooms

1 sliced onion, I used about half an onion

1 package onion soup mix

sliced provolone cheese

hoagie rolls

Onion soup mix

Onion soup mix

Fix the envelope of onion soup mix as directed then add half of that to a skillet then add the roast beef.

Simmering roast beef with onion soup mix.

Simmering roast beef with onion soup mix.

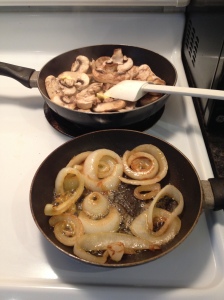
This allows the roast beef to heat up without drying it out and it gives it some flavor. While the beef heats up place the sliced mushrooms in a skillet with butter and place the onions in another skillet with butter.

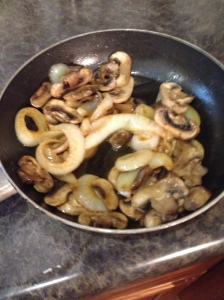
caramelizing the onions and sauteing the mushrooms.

caramelizing the onions and sauteing the mushrooms.

Once the onions were perfectly caramelized and the mushrooms sauteed I mixed them together.

mushrooms and onions.

mushrooms and onions.

I used the skillet that held the onions and heated it back up adding a bit more butter. I the laid the sliced rolls face down and slightly toasted them once at a time till all were crispy and hot.

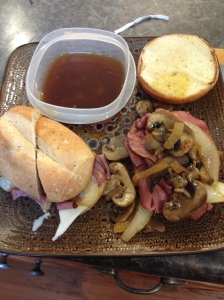
After that it was simply a matter of arranging the sandwiches with juicy layers of meat, onions and mushrooms, and cheese on top of those crispy rolls. I split the remaining onion soup mix into small bowls to use as a dip.

Almost Homemade Roast Beef

ready to eat!

I call this almost homemade since I bought the meat instead of cooking my own. They turned out delicious, not as good as with homemade roast beef, but still tasty and they satisfied my cravings! These cooked in less then thirty minutes

Tips:

#1 you can add anything you want to those sandwiches like sauteed green bell peppers or anything else your mind can come up with.

#2 You can use any lunch meat you want from ham to turkey to chicken breast…the possibilities are endless! I may try ham with sharp cheddar cheese next time I bet it will be just as delicious!

I also like this because it lets me use up the odds and ends in the fridge. All I had to buy was the bread since I had gotten the meat on sale and the mushrooms and onions were starting to get old….I love using up things on hand instead of tossing money in the trash by wasting food.

Homemade Hamburger Helper

Oh how I missed blogging! I have had multiple health issues in the past month which have left me feeling drained and listless after work. But I have several recipes in the hold waiting for posts!

My boyfriend loves meat, potatoes, white bread, miracle whip, processed cheese…well any process foods! We differ in our eating since I have dietary restrictions (limited red meat, no caffeine, limited sodas, no artificial sweeteners, limited processed foods…etc.) so I started looking up easy meals we could both eat. I was pleased to find a recipe for homemade hamburger helper of the cheeseburger variety that was sure to please us both!

Ingredients:
1lb lean ground beef (I used 97/3 since I have to have limited fatty red meats)
1 tablespoon cornstarch
2 teaspoons paprika
1 teaspoon onion powder
1 teaspoon garlic powder
1 teaspoon salt
1 teaspoon sugar
1/4 teaspoon pepper
1 cup hot water
2 cups skim milk
1-1/2 cups elbow macaroni (or other small pasta)
1 cup shredded sharp cheddar cheese


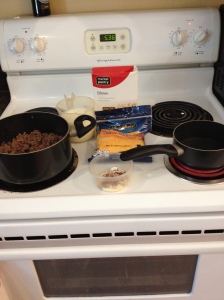
Ingredients

Ingredients

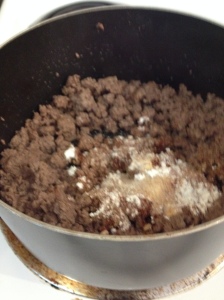
I started by cooking the hamburger and as it was cooking I mixed up the seasonings and corn starch in a small bowl and set it aside; while this was all going on I also boiled the hot water. Once the meat was cooked I rinsed it off in hot water to get rid of any leftover fat. Then I placed the meat back into the pot and added the seasonings, water, corn starch, hot water, skim  milk, and pasta then bring to a boil.

Browned meat with seasonings.

Browned meat with seasonings.

Cooking.

Cooking.

Once the pasta is to the desired cooked amount turn off the heat and mix in the shredded cheese. Let stand 5 minutes (or more) to thicken the sauce before serving.

Add cheese

Add cheese

Finished product

Finished product

This was just as quick and easy as making the disgusting boxed mix but way more healthy! There were no weird ingredients or preservatives and bonus my boyfriend (and daughter) loved it just as much, if not more, then the boxed stuff!

Tips

#1 I added 2 cups cheese because after one cup I tasted it and wanted a cheesier flavor but then again I love cheese lol.

#2 You can substitute ground turkey, chicken, or pork in place of the beef depending on your preferences.

Enjoy!

Happy Pinning!


Crock Pot Salisbury Steak

My boyfriend loves the frozen Salisbury steaks and I find them disgusting. I read the ingredients and all I saw was water, salt, salt, MSG, preservatives, and salt lol. So I found a tasty recipe for my trusty crock pot and they looked so good (I couldn’t sample since I am not allowed to have ground beef).

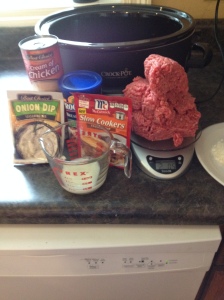
Ingredients:

2 pounds ground beef

1 packet dry onion soup mix

1/2 cup Italian seasoned bread crumbs

1/4 milk

1/4 cup all purpose flour

2 tablesppons vegetable oil

2 cans condensed cream of chicken soup

1 packet dry au jus mix

3/4 water

Salisbury Steak Ingredients.

Salisbury Steak Ingredients.

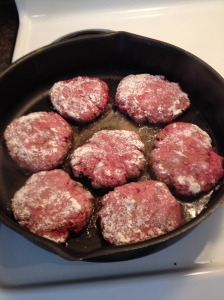
In a large bowl mix the ground beef, onion soup mix, bread crumbs, and milk then form into patties, should make 8. Heat oil in a large pan then dredge the patties in the flour to lightly coat them then place them into the pan to brown both sides.

Patties frying.

Patties frying.

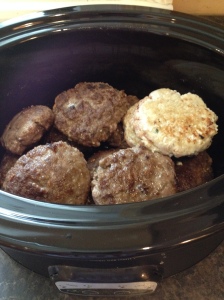
Place patties in a crock pot and stack them like a pyramid.

Patties in the crock pot.

Patties in the crock pot.

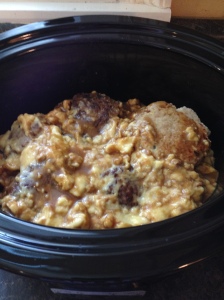
Mix cream of chicken soup, au jus mix, and water then pour over the patties in the crock pot.

ready to cook!

ready to cook!

Cook low for four or five hours until ground beef is well done! They cooked up very nicely and my boyfriend said they were so tasty, flavorful and said he liked them better then the frozen ones!


Tips:

#1 The store I went to didn’t have au jus mix so I used the slow cooker french dip mix and it worked out well.

#2 I would recommend using 93% or higher ground beef if you don’t like a lot of fat. I used 85/15% and the sauce had quite a bit of fat so I had to keep mixing it or the fat would separate.

#3 You can use any ground meat you want. I cant have red meat (doesn’t agree with my system) so I made myself a ground turkey patty (it’s the pale patty in the photo). It tasted wonderful!

I love this recipe and can’t wait to make it again!


Happy Pinning!

Homemade Chicken Noodle Soup

I have said it before and I will say it again….I hate wasting things and will reuse anything if it is possible. So once again I had a rotisserie chicken for dinner (this was made awhile back) and I saved the leftovers for soup!

Ingredients

Chicken still on the bone (could be leftover chicken or bone in split chicken breast or a whole chicken)

1 bag frozen egg noodles

1 bag frozen peas and carrots

1 bay leaf

salt and pepper

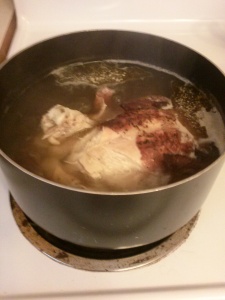
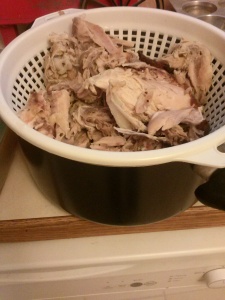
First I boiled the chicken all day until I had the meat slipping off the bones and a flavorful stock.

Boiling leftover chicken

Boiling leftover chicken

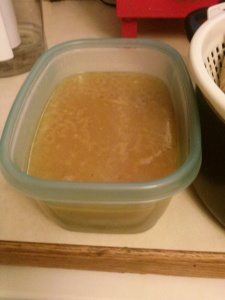
Homemade stock

Homemade stock


I then carefully poured the stock back into the pan and put it on to boil while I de-boned the chicken; putting aside the meat and tossing the bones.


De-boning leftover chicken

De-boning leftover chicken

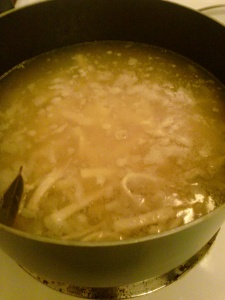
Once the stock was boiling I added the frozen egg noodles and the bay leaf along with seasoning it to taste.

Broth ready to boil noodles.

Broth ready to boil noodles.

Once the egg noodles were partly done I added the frozen peas and carrots to the broth and let it simmer. Finally I added the chicken and let it simmer a bit longer to heat up the chicken pieces.

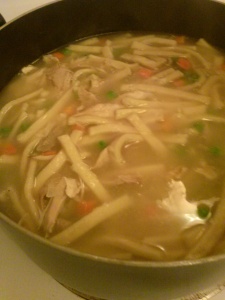
Finished soup

Finished soup

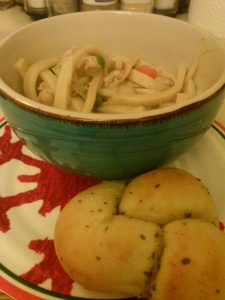
Once the soup was done I turned off the burner and covered it up to keep warm while I baked some bread for dinner! I made these yummy garlic knots I found at the grocery store but next time I will make the 1 hour dinner rolls with a recipe I found!

Ready to eat!

Ready to eat!

Hope you like it! Happy Pinning!!

Homemade Chocolate Frosting

One day I was baking a cake when I realized that I had no store bought frosting on hand! So after a quick scan in my cupboards I found powdered sugar and cocoa powder that I had bought for holiday baking. So  a quick search and I found a simple recipe for chocolate frosting!

Ingredients:

3 cups powdered sugar

3/4 cup unsweetened cocoa powder

1 stick unsalted butter

1/4 cup milk

1/4 teaspoon vanilla

The inspiration: http://www.simplyscratch.com/2010/07/homemade-chocolate-frosting.html

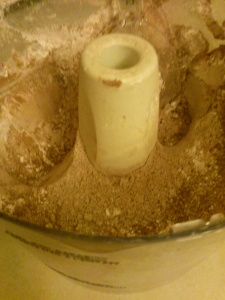
Cocoa powder and powdered sugar blended together.

Cocoa powder and powdered sugar blended together.

Sift sugar and cocoa powder together in a bowl then in another bowl cream together the butter and vanilla. Add a cup of the cocoa sugar mix to the butter then add a bit of milk then more of the sugar coca mix. Keep mixing the sugar cocoa and milk until you get the desired consistency.

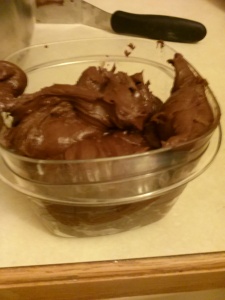
Finished frosting!

Finished frosting!

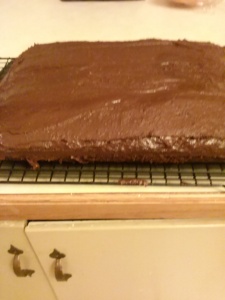
Then you use the frosting!! I spread mine over a sheet cake and it was delicious!!

cake ready to eat!

cake ready to eat!

Tips from me:

#1 I didn’t have a sifter to mix the sugar and cocoa powder so I added each to my food processor and pulsed it for a bit until it was blended!

#2 For thicker frosting use less milk and for thinner frosting, like a glaze, use more milk.

#3 Before you go and buy anything at the store look in your pantry! I am big on reusing items and I used up the rest of the cocoa powder and powdered sugar that I had purchased for Christmas cookies!

I liked how easy and delicious this frosting is! I have been using it ever since for all my cakes, brownies, and cupcakes! At first my daughter wasn’t sure if she wanted to try it. I realized then just how little I made basic items like frosting if her only exposure in 13 years is store bought! I informed her that before once upon a time people had to make their own cakes and frosting at home before mixes and store bought frosting was available. She then tried a slice of cake and declared it was the best frosting she’d ever had! Now I make it a point to make a lot of stuff without mixes so she can taste real home cooking!


Happy Pinning!!